Light-Up 3D Christmas Wall Diorama: LED Holiday Mural Backdrop
Every December the tree gets all the attention while a large stretch of bare wall nearby sits ignored. A 3D Christmas wall diorama gives that wall a job. Instead of hanging a flat wreath or a loop of garland, you build a small winter world that rises out of the surface: snowy hills, cabins with glowing windows, a toy train slipping into a tunnel, skaters on a frozen pond, and a night sky sprinkled with tiny stars.
The idea works because it combines three crafts in one project. There is sculpture in the snowdrifts and mountain ridges, painting in the sky and the rooftops, and lighting design in the way LED strands trace roads, outline windows, and wrap tree branches. Once the room dims and the lights come on, the piece stops reading as decoration and starts to feel like a miniature stage set that guests stop to study, usually for much longer than they planned.
This guide explains how a light-up LED holiday mural backdrop is put together, why the layered look is so convincing, how different themes change the mood, and how to keep the build safe and easy to pack away when the season ends.
What Exactly Is a 3D Christmas Wall Diorama?
A traditional diorama lives inside a box or on a tabletop. Christmas village displays usually claim a sideboard, a mantel, or a corner of the floor, which means giving up surface space the family needs for other things. A 3D Christmas wall diorama moves the entire scene onto the vertical plane. Hills climb upward, roads zigzag from a lower corner toward a peak, and the sky above becomes part of the artwork rather than empty paint.
The name combines three ideas. 3D means the scene has real relief, with parts that stand out from the wall by a few centimeters or by half a meter. Wall diorama means the whole composition is anchored to the surface and designed to be viewed from the front, the way you would look at a painting. LED mural backdrop means the lighting is built into the design from the first sketch instead of being added at the end as an afterthought.
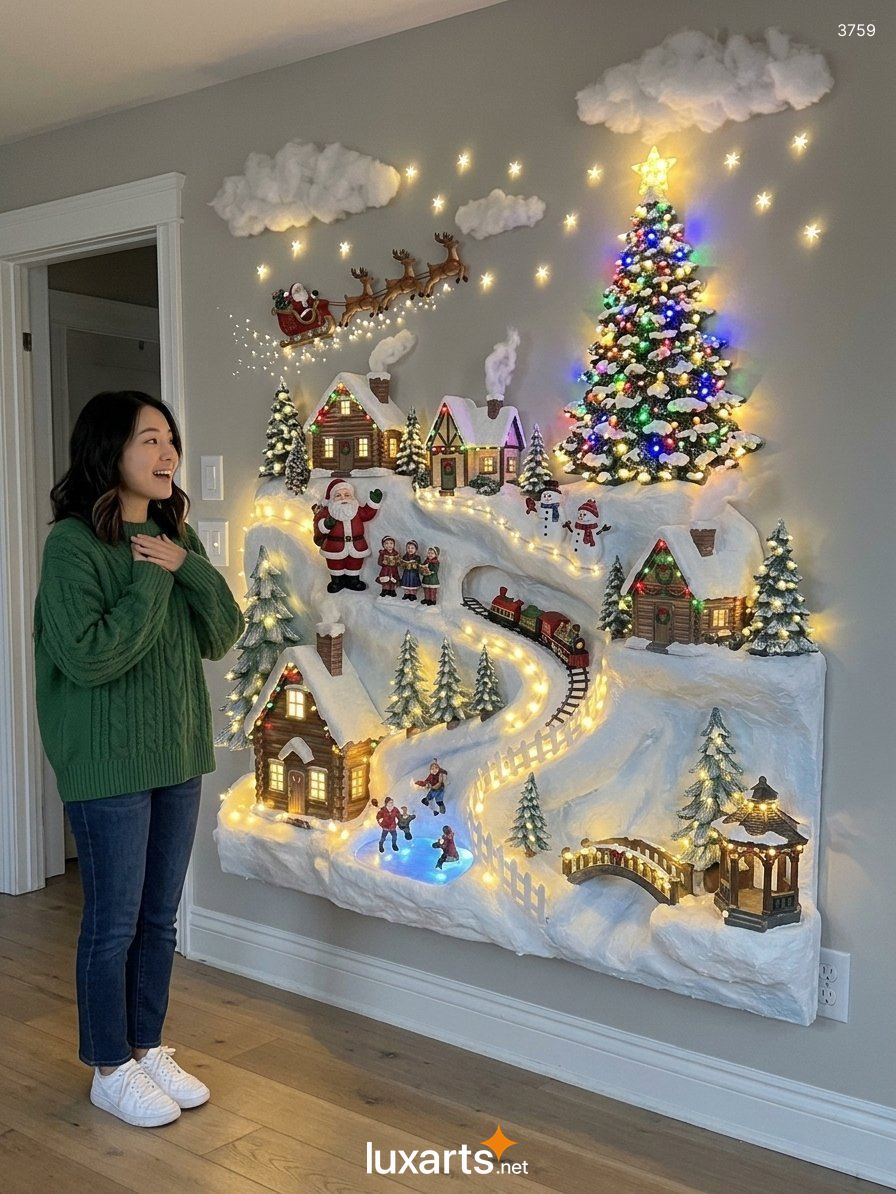
Some versions project into the room like a snowy ledge, with the front edge sculpted into rough drifts, as in the hillside scene above. Others sit flat inside a painted arch or a rounded panel, like a window into a snow globe. Both approaches share the same goal: give the eye a path to follow and a reason to keep looking.
Building Depth With Layers, Terrain, and Perspective
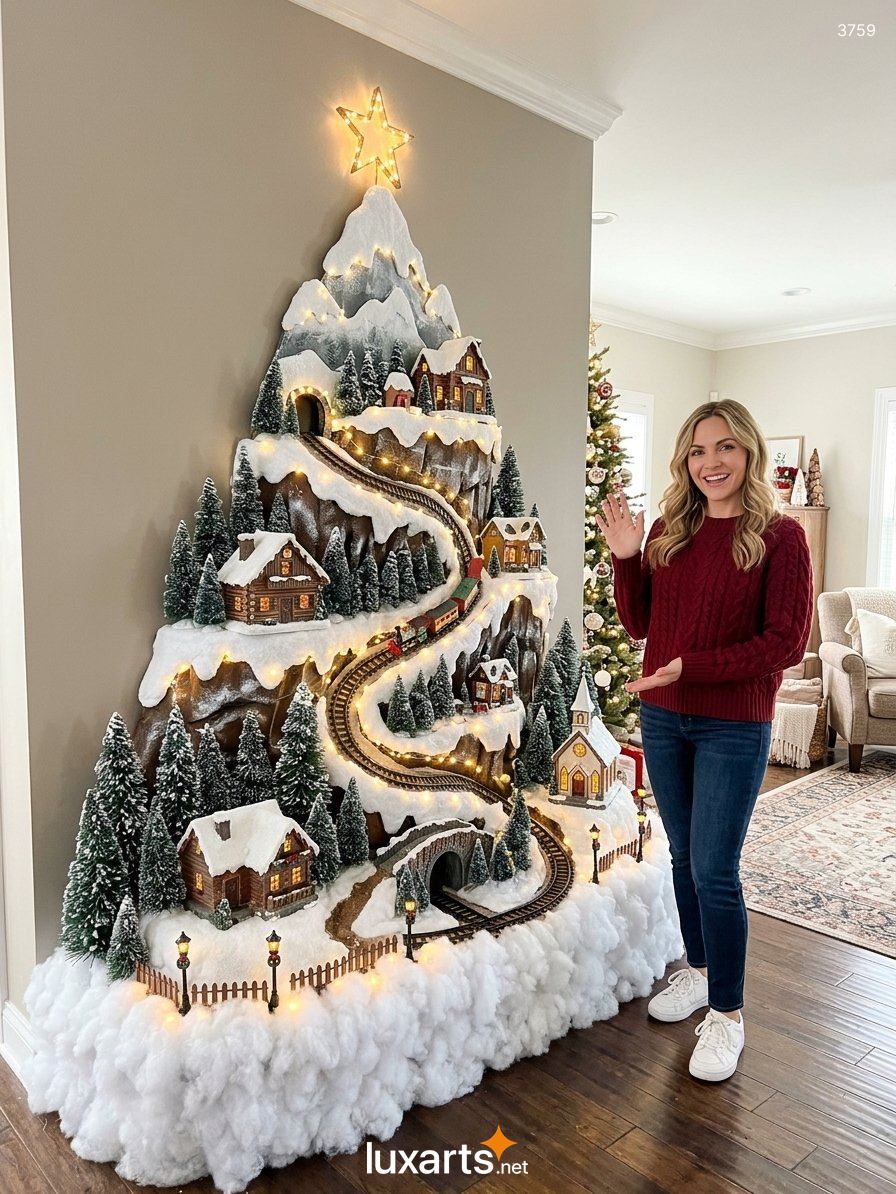
The most striking builds look deep because the maker treats the wall like a stage with a front, a middle, and a back. The tree-shaped mountain above is a good example. The snowy summit and grey rock faces sit furthest back, a winding railway occupies the middle, and picket fences, lamp posts, and a thick bank of batting along the bottom fill the foreground.
A few simple habits create that sense of distance:
- Scale the trees down as they climb. Large pines near the bottom and tiny ones near the summit trick the eye into reading height as distance.
- Zigzag the road. A track or footpath that switches back across the slope is longer than it looks, and it guides the viewer upward through every tier.
- Cut tunnels and arches. A train that vanishes into a mountain and reappears on a lower level adds a small surprise and hides the awkward ends of a track.
- Alternate rock and snow. Dark brown or grey stone between white drifts gives the snow something to contrast against, so the whites look brighter.
- Cluster the houses. Two or three buildings crowded beside a road feel lived-in, while evenly spaced ones feel like a parking lot.
Sculpting Snow: Textures That Look Soft but Hold Their Shape
Snow is the unifying material of every winter diorama, and it is also where beginners tend to go wrong. A flat coat of white paint looks like a wall, not a hillside. Believable snow needs bumps, shadows, and small variations in color.
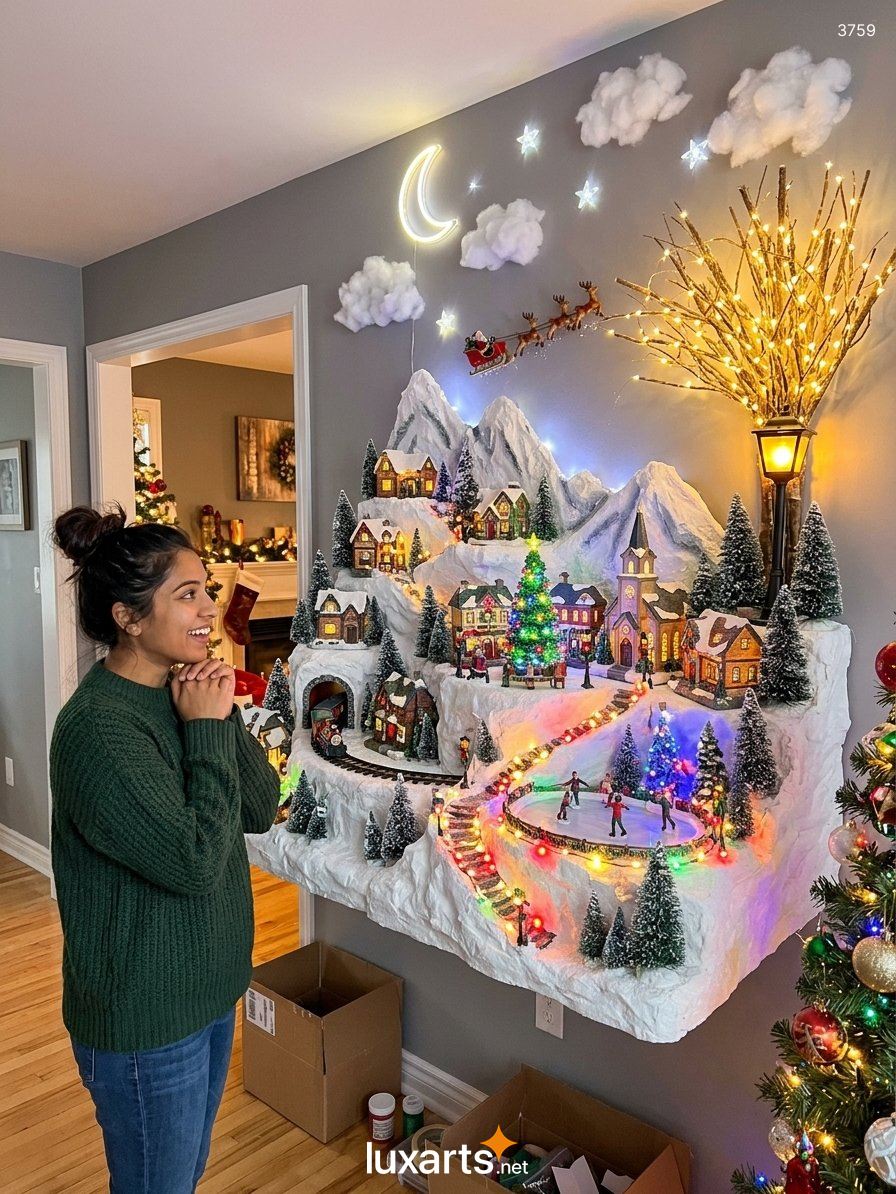
Many builders start with a lightweight core made from foam board, corrugated cardboard, or crumpled paper held with tape. Over that skeleton they add a skin of paper mache, textured wall compound, or fabric dipped in plaster. The rugged ledge in the photo above shows how well this works: the crinkled surface catches light at odd angles and reads immediately as packed snow and ice.
Color matters as much as shape. Pure white on every surface flattens the scene. A thin wash of pale blue or lavender in the hollows and a brighter white on the ridges gives the drifts volume, especially when the room lights are low. A final dusting of fine white glitter or pearlescent powder adds a frosty sparkle that picks up the LED glow.
For soft, fluffy banks along the base, polyester fiber batting pulled into irregular clouds is hard to beat. It imitates deep snow, hides cable runs, and gives the display a gentle edge where the sculpted hill meets the floor. The same batting, stretched thin and shaped by hand, also makes convincing clouds, chimney smoke, and the puffy shapes floating beside the moon.
Lighting the Scene: LED Techniques for a Holiday Mural Backdrop
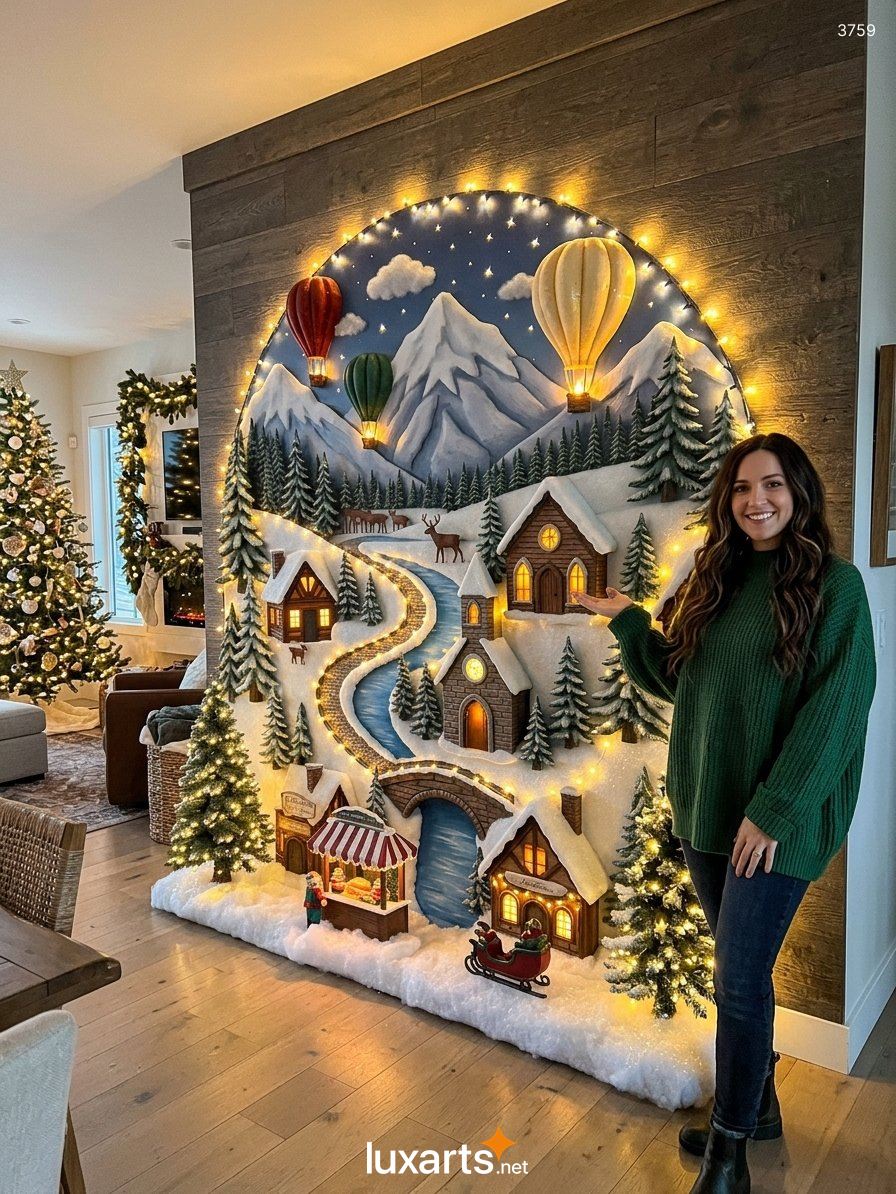
Lighting separates a pretty craft from a display that truly glows. LEDs suit this job because they run cool, draw little power, and come in thin wire strands that disappear into a landscape. The arched mural above shows the principle clearly: a warm string follows the curved border like a frame, tiny stars float in the sky, and the windows shine from within.
It helps to think of the lighting in three layers.
Ambient Glow
Edge lighting and fairy strands along roads, fence lines, and the base give the whole piece a soft background glow. Warm white feels closest to candlelight, while multicolor strands suit a playful, retro look like the rainbow-lit slope in the ledge scene shown earlier.
Accent Light
Windows, lanterns, and street lamps need small, focused sources. Many makers place a micro LED or a battery tea light inside each house and cover the cut-out windows with frosted paper or tinted acetate, which softens the glare into an amber glow.
Focal Light
A lit tree, a star, or a branch sculpture draws the eye first. A bundle of twigs wrapped in warm white lights, like the glowing branches rising behind the lamp in two of the photos, works as a bare winter tree and as a light source for the surrounding wall.
Special effects add personality. A blue LED tucked beneath a translucent sheet turns a frozen pond into glassy ice, an orange flickering bulb creates a believable campfire, and a slow twinkle setting on the star makes the sky feel alive. Keep every strand within a similar color temperature, mix no more than two or three tones, and run everything through one timer so the display switches on at dusk without anyone remembering to do it.
Painted Skies and Night Backdrops
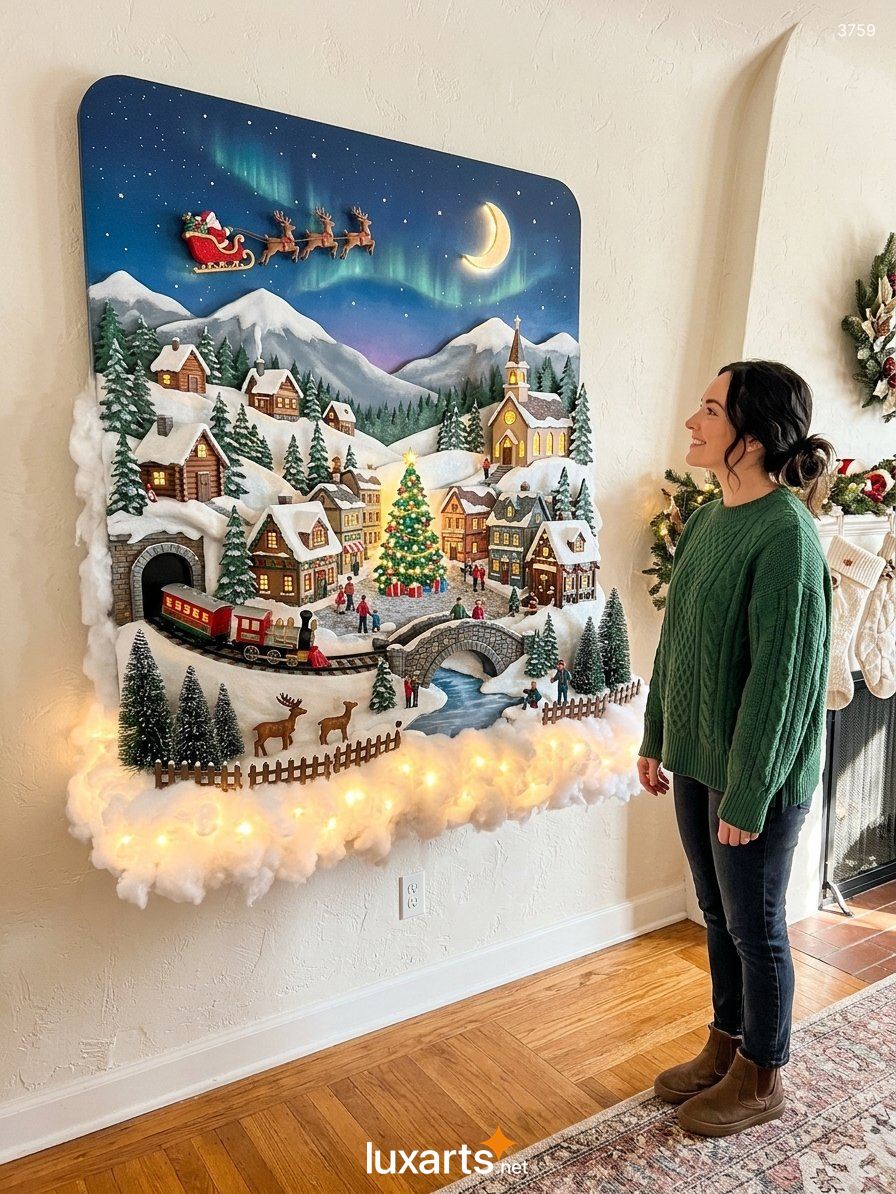
The backdrop sets the emotional tone before the viewer notices a single house. A deep navy sky fading toward lavender at the horizon feels quiet and magical, while a pale blue daytime sky feels cheerful and bright. The panel above adds ribbons of green aurora and a glowing crescent moon, and the sleigh crossing the sky tells the story in a single glance.
To paint a night sky like this, start with the darkest blue at the top and blend toward a lighter violet at the bottom using a damp sponge or a wide brush while the paint is still wet. Aurora bands work best as thin, translucent glazes of teal and green, brushed in a gentle arc and softened at the edges. Stars can be dots of metallic paint, small adhesive gems, or pinpoint LEDs poked through holes drilled in the board. Mountains in layered greys, each lighter than the one before, finish the horizon.
Rounded panel corners, like those in the photo, give the scene a clean boundary so it reads as one finished picture even when the wall around it is textured or busy. The cloud-like batting along the bottom edge hides a strand of lights, which makes the whole board look as if it is floating.
Miniatures, Characters, and Storytelling
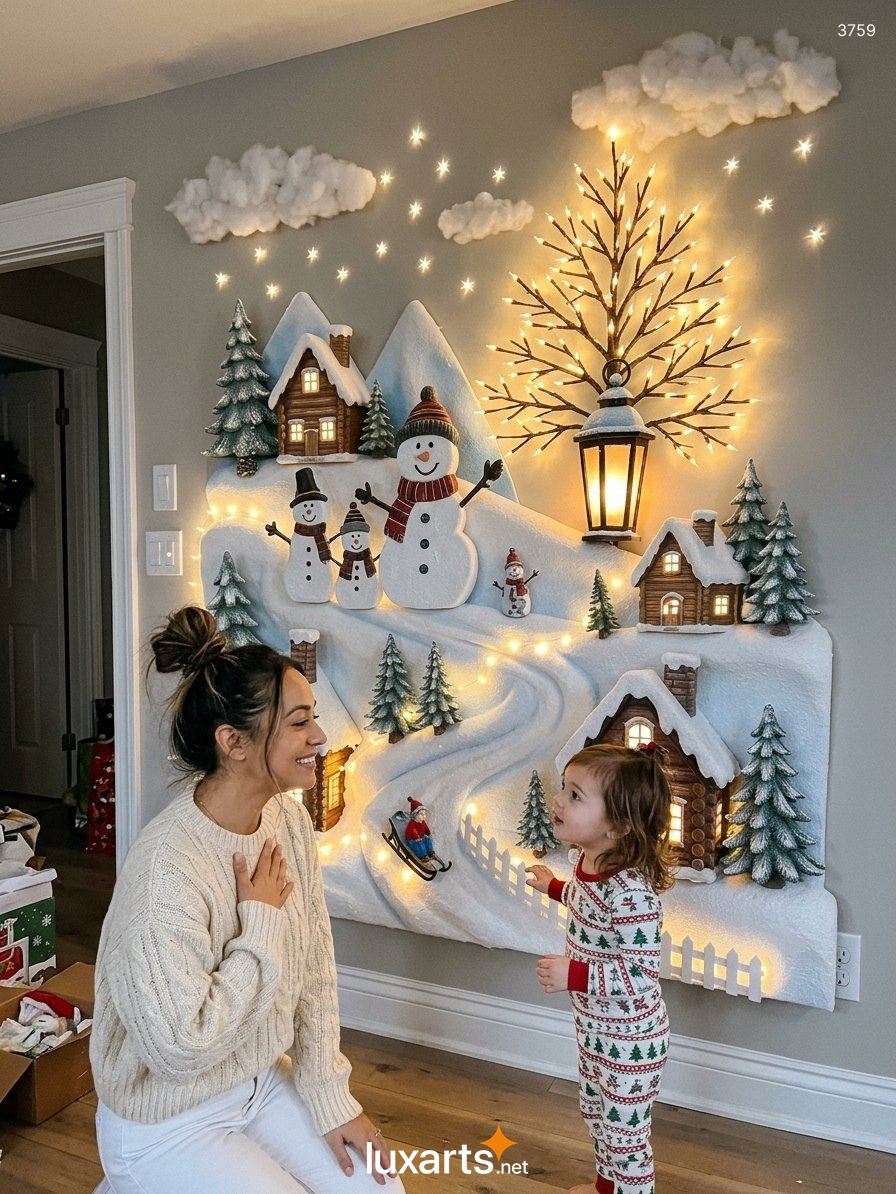
A diorama becomes memorable once it tells a story. The snowman family on the hillside above gives the scene a focal point and a bit of humor: a tall one in a striped scarf, two smaller ones in top hats, and a tiny one off to the side. A small sledder at the bottom of the slope suggests motion, and a picket fence keeps the eye traveling toward the corner.
Scale discipline helps. Pick one figure height as a rule, such as the size of a typical village caroler, and keep most items close to it. Small cheats are acceptable for a hero element like the giant snowman or the tree, but a skater taller than a cabin will break the illusion.
Group figures in small scenes instead of scattering them. Carolers beside a lamp post, children gathered around a tree, skaters circling a pond, and a train crossing a bridge each give viewers a little story to discover. Leave breathing room too: a patch of untouched snow makes the busy areas feel richer.
Theme Ideas That Turn One Wall Into a Whole World
The same techniques support very different looks. These five directions show how far a single wall can travel.
The Frozen Pond and Log Cabin
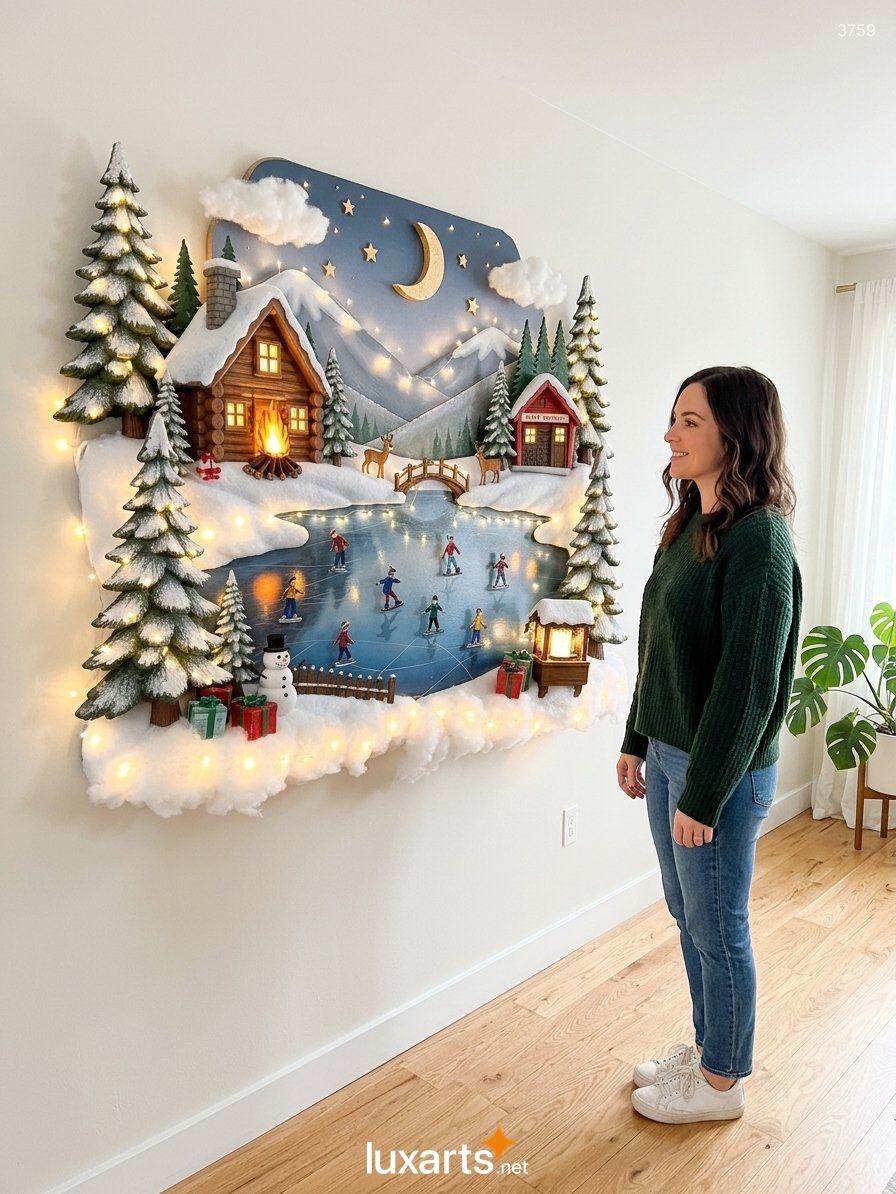
A skating pond is the easiest way to add motion without any motors. Paint a glossy blue-and-white oval, add a thin coat of clear gloss or a sheet of acetate to imitate ice, then pose a handful of skaters in different directions. A cabin with an LED campfire at its door, a small footbridge, a pair of deer, and wrapped gift boxes complete a cozy corner, while tall snow-dusted pines frame both sides like theater curtains.
The Enchanted Forest Arch
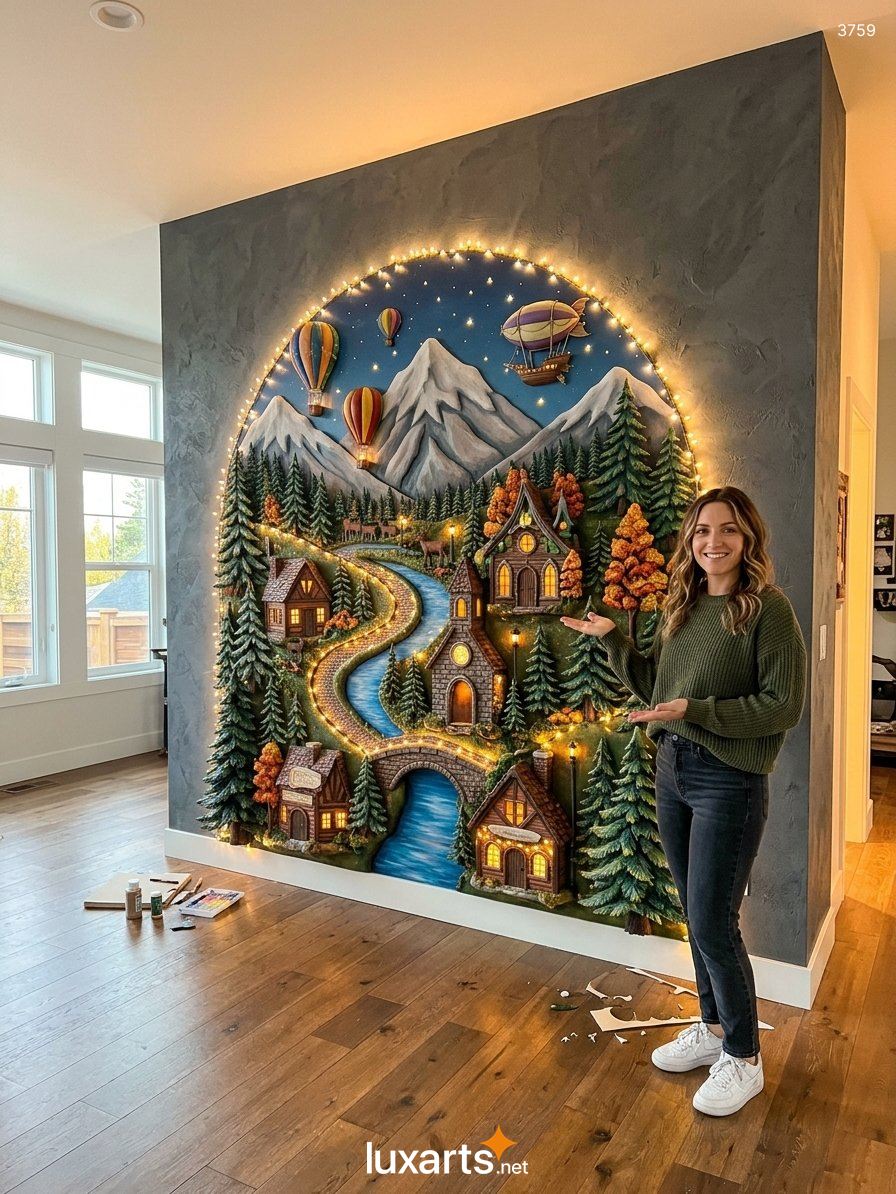
This arched composition blends winter with a hint of fantasy. Hot air balloons and an airship drift above jagged peaks, a river winds under a stone bridge, and a cobblestone path leads past a clock-tower chapel. Touches of rust orange foliage soften the evergreens, and a ring of warm lights follows the curve of the arch. Set against a dark, textured wall, the bright scene glows like a window into another place.
The Castle on the Hill
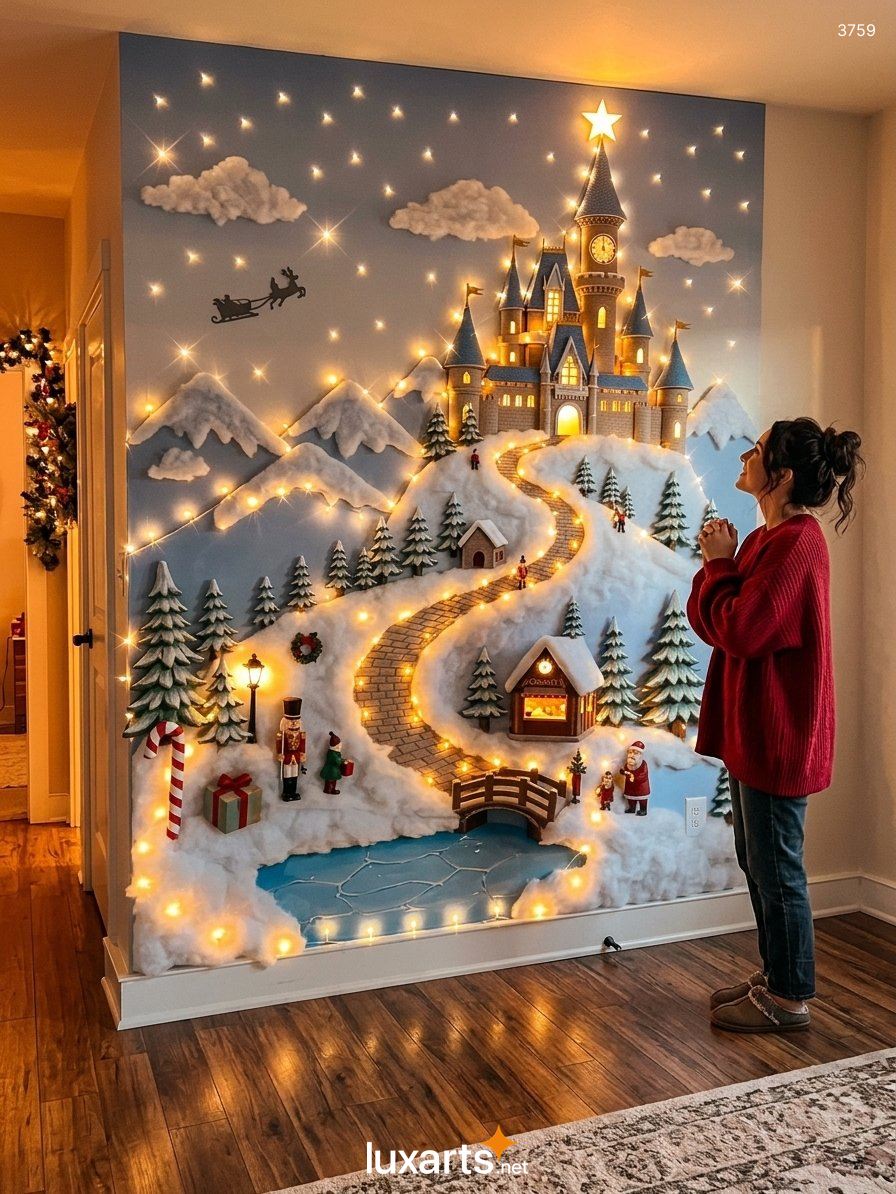
Full-wall designs allow a bolder concept. A clock-tower castle crowns the hilltop here, a brick road curves down through snowy slopes, and a nutcracker guard stands near a candy cane and a wrapped gift. A silhouette of Santa’s sleigh crosses the pale blue sky under a field of small lights, while a frozen pond with a crackled ice pattern marks the foreground. Because the sky is simply painted onto the wall, only the lower half needs heavy sculpting, which keeps the structure lighter.
The Alpine Village Wall
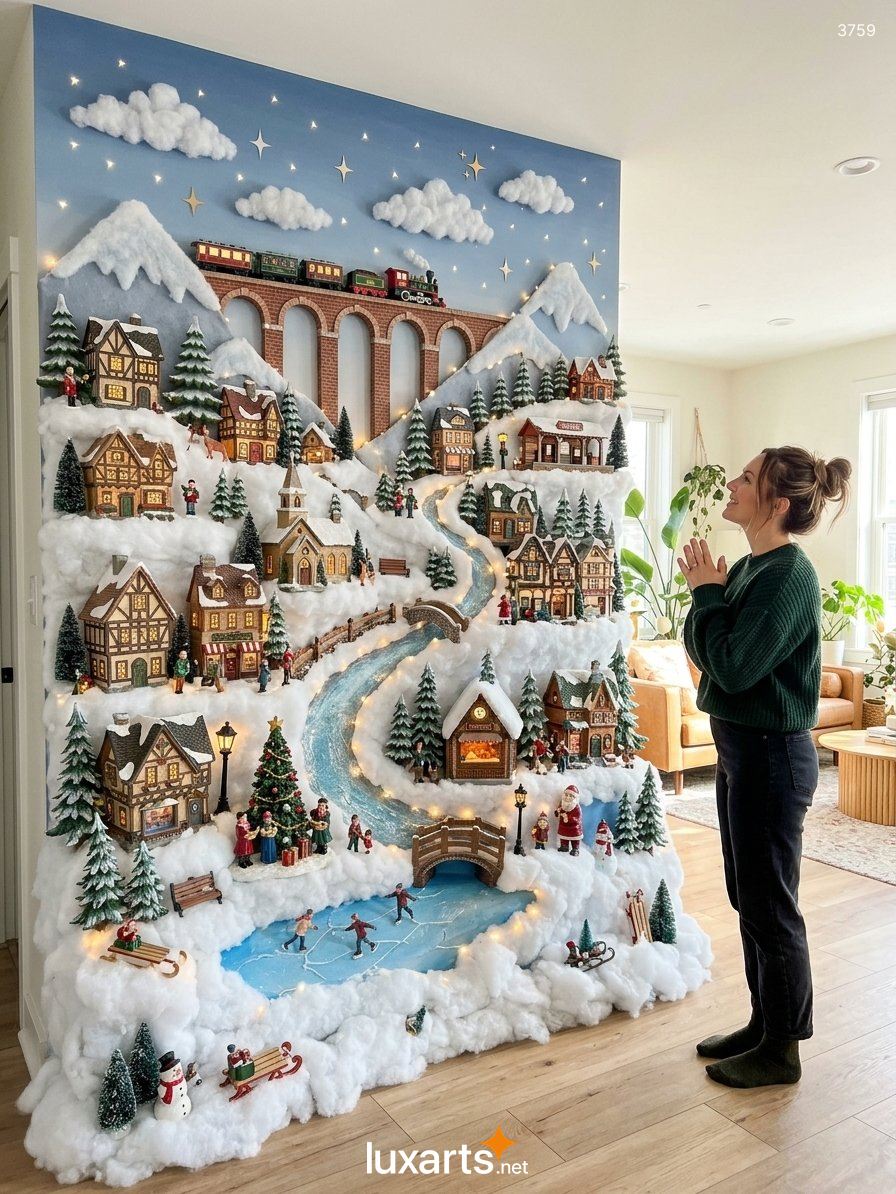
Collectors of miniature houses will appreciate this one. Half-timbered buildings sit on stepped terraces, a river tumbles down the center, and a brick viaduct carries a toy train across the top of the wall. Each tier is a shelf, so houses can be swapped, rearranged, or added year after year. Planning the shelves before the snow goes on keeps the structure strong and the layout balanced.
The Gingerbread and Candy Cane Peak
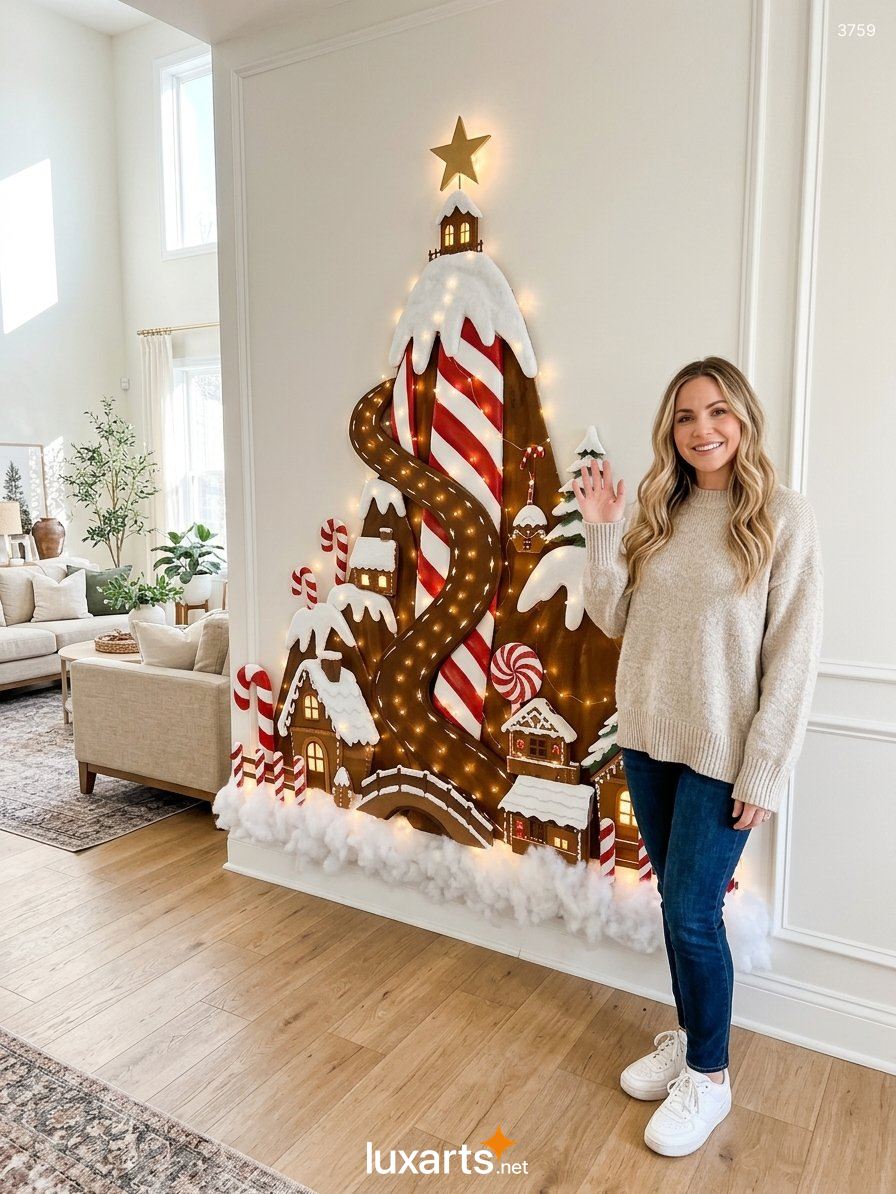
For a flatter, more graphic style, a tree-shaped silhouette cut from wood panels can hold a chocolate-brown road, a giant striped candy cane mountain, and small gingerbread cottages with icing-white roofs. A gold star crowns the summit, and lights run along the road. This version sits close to the wall, so it suits narrow hallways and homes with little floor clearance.
Safe Wiring and Secure Mounting
A beautiful display should also be a safe one, because it will stay up in your home for weeks. LEDs give off very little heat, but a few precautions still apply.
- Use low-voltage or battery-powered strands wherever possible, and choose sets that carry a recognized safety certification.
- Keep fiber batting, paper, and fabric away from any bulb or power adapter that feels warm to the touch.
- Route cords behind the scenery and finish with one tidy line to the outlet, controlled by a timer.
- Skip real candles and open flames. Flickering LED flames deliver the same mood without the risk.
- Avoid overloading a single outlet or chaining several extension cords together.
Weight is the other concern. A sculpted hillside can be heavier than it looks, so build in lightweight sections from foam board and hang each section on wall studs or rated anchors. A French cleat, which spreads the load along a horizontal rail, works well for larger panels. Modular sections also make the project easier to move later. In a home with toddlers, as in the family scene above, attach figures firmly and place delicate pieces higher than small hands can reach.
Choosing the Right Spot in the Room
Location changes how the display feels. A hallway wall invites people to walk slowly past and look closely, while a living room accent wall behind the sofa works like a backdrop for family photos. Place the main focal point near eye level, since that is where the details live, and push the sky and clouds higher. Leave an outlet nearby so cords do not stretch across the floor.
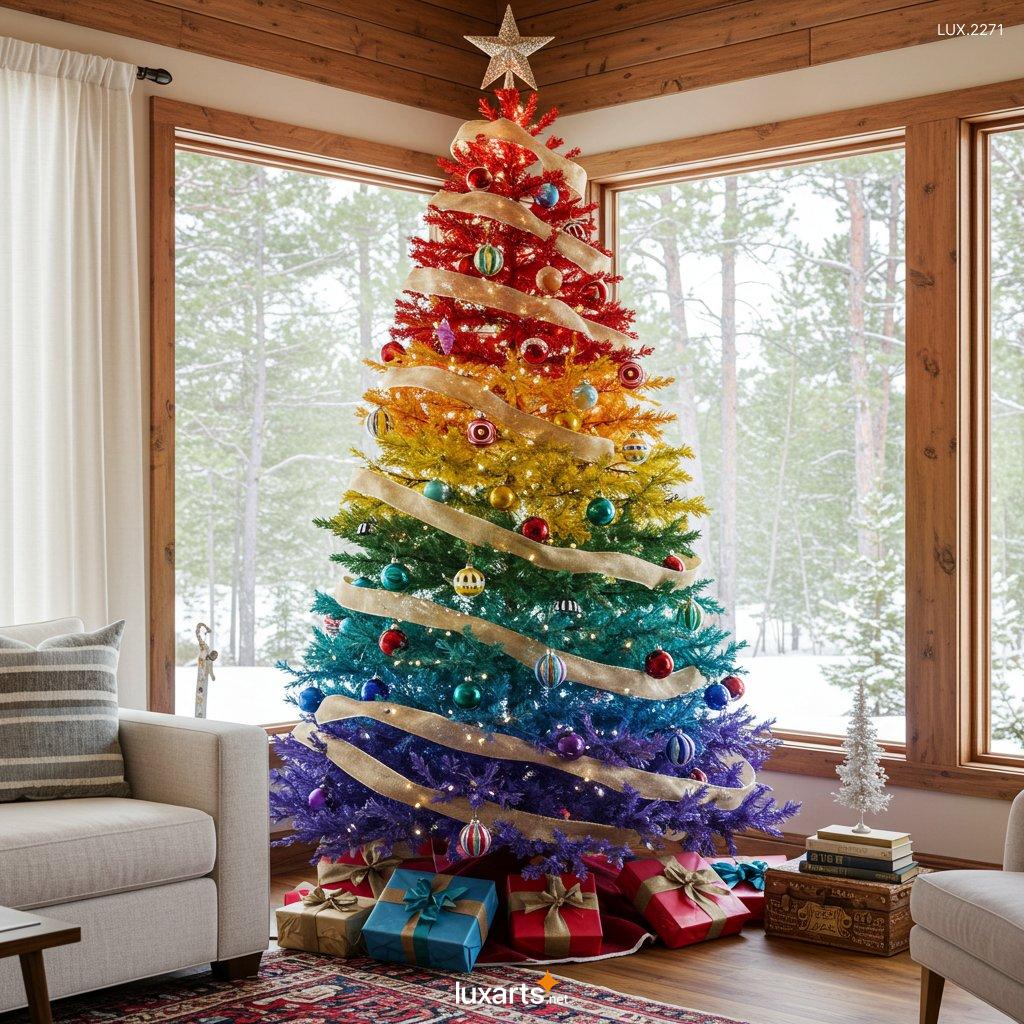
Keep the display away from direct sunlight, which washes out the glow and can fade paint over time. It pairs especially well with a real tree in the same room, as several photos here show: the tree supplies the tradition, and the diorama supplies the story. In the evening, dim the overhead lights so the LEDs carry the room.
Turning the Build Into a Family Project
One reason these displays have become so popular is that nearly everyone can contribute. Adults handle the cutting, wiring, and mounting, while children paint snowmen, sprinkle glitter, and decide where the skaters stand. Sketch the layout on paper first, divide the wall into sections, and build each one on a table before it goes up. Working in stages keeps the mess contained, and some of the photos here even show paint bottles and cardboard boxes close by, a reminder that this is a hands-on project. Photograph each stage as you go; the pictures become part of the family’s holiday history.
Care and Storage After the Holidays
Take the display down in sections rather than as one piece. Unplug the strands, label each cord with the panel it belongs to, and wrap the lights around a piece of cardboard to prevent tangles. Dust the figures and houses with a soft brush, keep the fiber batting in sealed bags so it stays clean and fluffy, and store flat panels upright between sheets of cardboard. Test every light before packing and again before the next season, and keep a small jar of white and blue paint for touch-ups. With a little care the same diorama can return year after year, with a new house, figure, or scene added each time.
Final Thoughts on Building Your Own 3D Christmas Wall Diorama
A 3D Christmas wall diorama rewards patience. It starts as a bare wall, a few sheets of foam, and a rough sketch, and it ends as a glowing village that people lean toward and point at. The craft depends on layering, careful lighting, and a clear story, but none of it requires professional training, only a willingness to build in small steps.
Whether the finished piece becomes a snowy hillside, a gingerbread peak, or a castle above a frozen pond, an LED holiday mural backdrop gives the season a centerpiece that grows more personal every year. Pick a theme, sketch the hills, and let a single strand of warm lights lead the way.
NOTE: All images in this post are AI-generated and intended solely for inspiration. These are not real products available for sale, and we do not operate any online store or website for purchases.